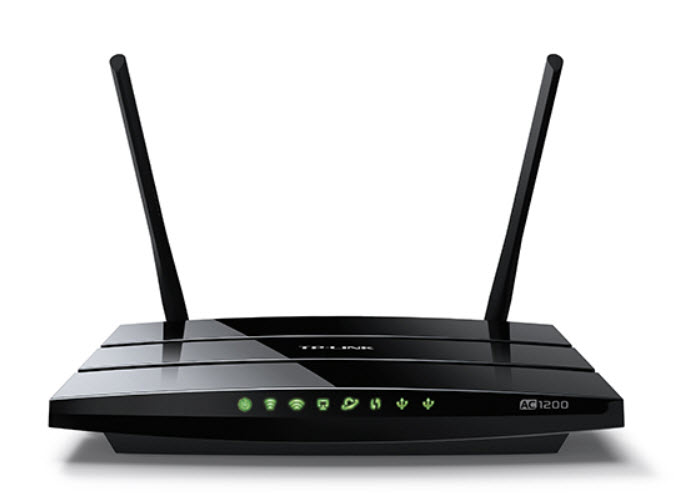
The Archer C5 Wireless Dual Band Gigabit Router integrates 4-port Switch, Firewall, NAT-router and Wireless AP. Powered by 2x2 MIMO technology, the AC1200 Wireless Dual Band Gigabit router delivers exceptional range and speed, which can fully meet the need of Small Office/Home Office (SOHO) networks and the users demanding higher networking performance.
Your wireless connections are radio band selectable to avoid interference in your area, and the four built-in Gigabit ports supply high-speed connection to your wired devices.
Before you begin:
Step 1: Power off your modem and disconnect your existing router (if you have one). If the modem has a backup battery, please remove it too.
Step 2: Use an Ethernet cable to connect the Internet (blue) port of the router to the modem’s LAN port.
Step 3: Use another Ethernet cable to connect your computer to one of the Ethernet ports (yellow) labeled 1/2/3/4 on your router.
Step 4: Turn on your modem and wait for 2 minutes. (Replace the battery if you removed it previously.)
Step 5: Plug the supplied power adapter into the Power jack, and then press the On/Off button to turn on the router and wait for 1 minute.
Step 6: Verify that the LEDs for Power, 2.4G Wireless, 5G Wireless and Internet (located on the front of the router) are on and solid before continuing with the configuration.
Before you begin, make sure you intent to place your router in a well-ventilated location far from any heater or heating vent. Avoid locations with direct sunlight. Keep at least 2 inches (5 cm) of clear space around the router.
Step 1: Open a web-browser (such as Microsoft Internet Explorer, Mozilla Firefox or Apple Safari), and type in the default IP address http://tplinkwifi.net or http://192.168.0.1 and press 'Enter.'
Note: If the login window does not appear, please refer to the Troubleshooting & Support section of the router FAQs.
Step 2: When the login window appears, enter "admin" for the Username and Password, both in lower case letters. Then click the 'Login' button or press 'Enter.'
Step 3: After successful login, the Quick Setup page will appear for you to select your Region and Time zone. After finishing the selection, click 'Next.'
Step 4: Then WAN Connection Type page will appear. Select your connection type (if you know it) or click the 'Auto Detect' button; then click 'Next' and follow the instructions to continue.
Note: Make sure the cable is securely plugged into the Internet port before using Auto-Detect. Auto-Detect supports only three popular connection types, PPPoE, Dynamic IP, and Static IP. If your connection type is L2TP or PPTP, you need to manually select the type and click Next to move forward with configuration. If you are unsure of what your connection type is, click 'Auto Detect.'
Step 5: Select 'Do Not clone MAC Address' then click 'Next' to continue.
Step 6: After finishing the WAN Connection Type selection, you need to configure the basic parameters for your wireless network, including 2.4GHz and 5GHz, and then click 'Next.'
Note: If you change the default SSID and password, write down the new wireless setting.
Step 7: On the Summary page, verify your settings. If anything is incorrect, click 'Back' to change it; if not, click 'Save' to continue.
Step 8: Congratulations! You have completed the Quick Setup process. You can click 'Test Internet Connection,' and then click 'Finish' to exit.
What can I do of the login window does not appear?
What can I do if I cannot access the internet?
How do I restore the router to its factory default settings?
What can I do if I forgot my Web Management password?
Restore the router to the factory default settings and then use the default 'admin' (all lowercase) for both username and password to log in.
What can I do if I forgot my wireless network password?
If you have not changed the default Wireless Password, it can be found on the product label of the router. Otherwise, log in to the Web Management page, go to Basic > Wireless to retrieve or reset your wireless password.
How can I test my Wi-Fi performance?
How can I optimize my speed?
Changing the channels on your router can help to avoid interference from other network and radio frequency equipment. Go to Wireless >Wireless settings and change the Channel settings.
The default value is 'Auto.' We recommend selecting 1, 6, 8 or 11, if you are experiencing high wireless interference or slow speed.